Introduction to Offline Wikipedia:
Use your Raspberry Pi for Offline Wikipedia with Kiwix-serve. Learn how to download Wikipedia for one of the ultimate Raspberry Pi Projects.
If the power or Internet goes out, wouldn’t it be cool to still have access to a large source of useful information? Granted most of us have access to high-speed Internet however many still do not. In addition, folks living in remote areas often have power outages when stormy weather strikes.
Create your own Raspberry Pi Hotspot!
Consequently, since the Raspberry Pi has built-in networking a hot spot can be created so you can share your local copy of Wikipedia. Imagine family and friends searching Wikipedia on their cell phones and tablets all stored locally on your Raspberry Pi!
It is not just Wikipedia; it can be any website!
It is not just Wikipedia; you can read books from the Gutenberg Library, watch TED talks and much more. Since the Wikipedia downloads can be large, there are versions without pictures. In addition, smaller specific topics within Wikipedia can be downloaded. For example, imagine having the Medical, Movie, Golf, History, etc. Wikipedia books at your fingertips.
Raspberry Pi Offline Wikipedia Project Description:
This Raspberry Pi Project will install a copy of Wikipedia of your choice on your Raspberry Pi. In addition, the Kiwix-serve application will be download and installed. The Kiwix-serve application will enable you to search Wikipedia using the Web Browser on your Raspberry Pi.
Minimum Offline Wikipedia Project Requirements:
- 32GB Micro-SD Card
- Raspberry Pi OS with Desktop Installed on Raspberry Pi 3, 4 or 400
- High Speed Internet Connection 100Mbps – 200Mbps
The minimum requirements assume you have Raspberry Pi OS with Desktop installed on a Raspberry Pi 3, 4 or 400. The 32GB Micro-SD card will not allow you to download the full maximum version of Wikipedia with Pictures. However, for the purpose of this project you can choose from many other smaller or specialized versions of Wikipedia.
Recommended Project Requirements for Offline Wikipedia:
- 128GB – 256GB Micro-SD Card
- Raspberry Pi OS with Desktop already installed on Raspberry Pi 3, 4 or 400
- High Speed Internet Connection 500Mbps – 900Mbps
For this project, it is recommended that you have the Raspberry Pi OS with Desktop already installed on a Raspberry Pi 3, 4 or 400 with a 128GB Micro-SD Card. The 128GB Micro-SD Card is required for larger or the full maximum version of Wikipedia with Pictures. Additionally, a high-speed Internet connection, as close to 900MBps as possible is recommended. In other words, larger Wikipedia files require more storage space and faster Internet speed. Let us Begin…
Step One: Download Kiwix Wikipedia zim file:
Unfortunately, the direct link to the zim file downloads does not always work, and often will redirect users to the main page. For this reason, it is recommend starting at the Kiwix.org home page. Pictures provided below will use Red arrows and Circles to assist in navigating to the actual downloads page.
Open Chromium or your favorite web browser on Raspberry Pi desktop, and navigate to the following URL:
https://www.kiwix.org
The following picture provides an example of the main home page for kiwix.org:

Using the Red arrow as a guide, scroll the kiwix.org home page downward until you get to the bottom. The following picture gives an example showing the link you will need next:
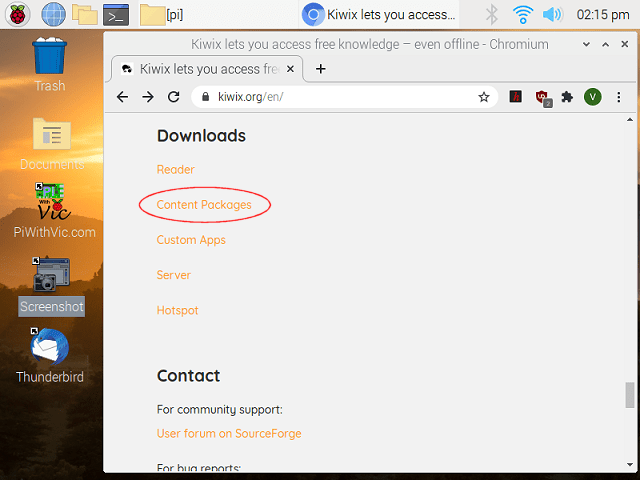
Click on the Content Packages link navigating to next page as shown below:
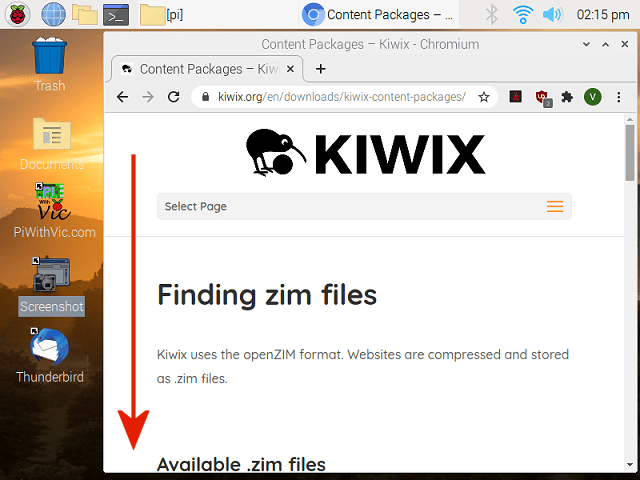
Using the red arrow as a guide, scroll the page downwards slowly, until you see the Kiwix Wiki link for packages in all languages as shown in the following picture:
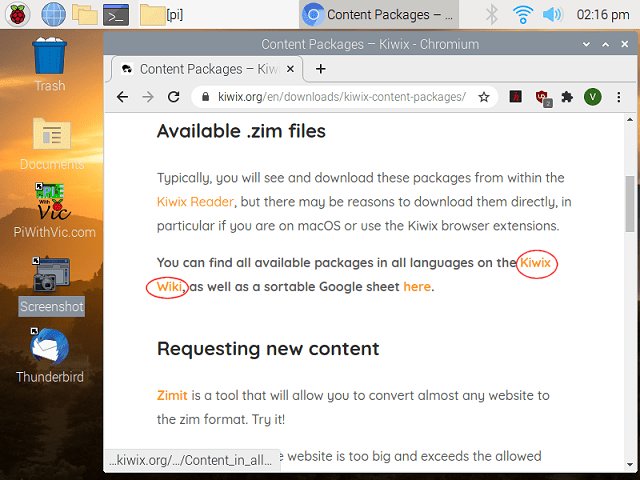
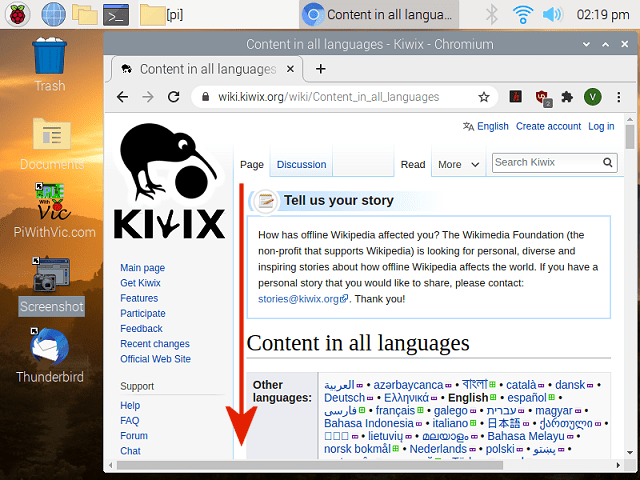
After navigating to above link, the following web page will display all available packages. Packages will be grouped in sections for each available language as shown below:
Several Choices:
Using the red arrow as your guide, scroll downwards alphabetically through each language section until you get to your desired language. The picture below shows an example of the section for English downloads. Take note of the different file sizes shown in the middle column. If you have 32GB Micro-SD card you will probably want smaller files like the 11G shown in picture below:
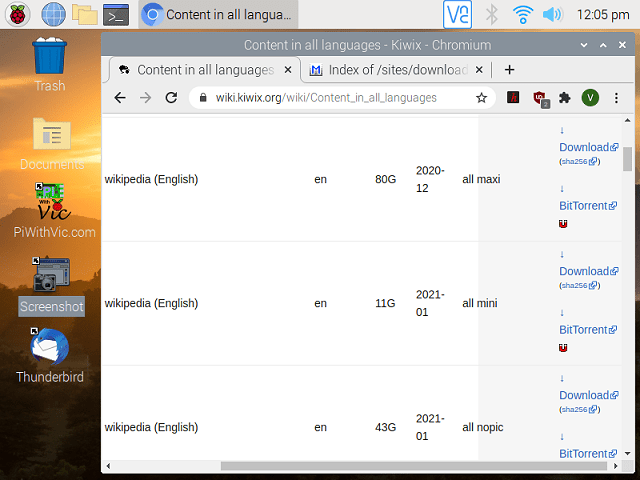
The files are named to help describe what you are downloading. For example, files named “all maxi” have more content with pictures and thus larger. Files name with “nopic” will be smaller and have no pictures with content.
The direct download link on the right side is displayed above the BitTorrent download link. Use either direct or BitTorrent method for downloading. However, when using BitTorrent, you will need to install the client application first before downloading.
Choose zim file and start downloading:
Once you have chosen a zim file and started downloading, be prepared to have your Raspberry Pi tied up for several hours.
Note: This project for demonstration purposes assumes the zim file will be in your Downloads directory within your Home Directory once the download is finished. Additionally, when in Terminal, your home directory is displayed in the command prompt with the “~” character.
Step Two: Installing Kiwix Serve for Raspberry Pi Projects Offline Wikipedia:
As a result, there should be a massive file in your Downloads directory on your Raspberry Pi. The next step will be to download the Kiwix-serve application. The Kiwix-serve application can read the zim file downloaded above. The result will enable you to use Offline Wikipedia in your Raspberry Pi web browser.
Downloading Kiwix Serve tar Archive file:
Navigate to the following URL in your favorite web browser while using your Raspberry Pi:
https://www.kiwix.org/en/downloads/kiwix-serve/
As shown in the picture below select the download link for the GNU/Linux ARM (32 bits):
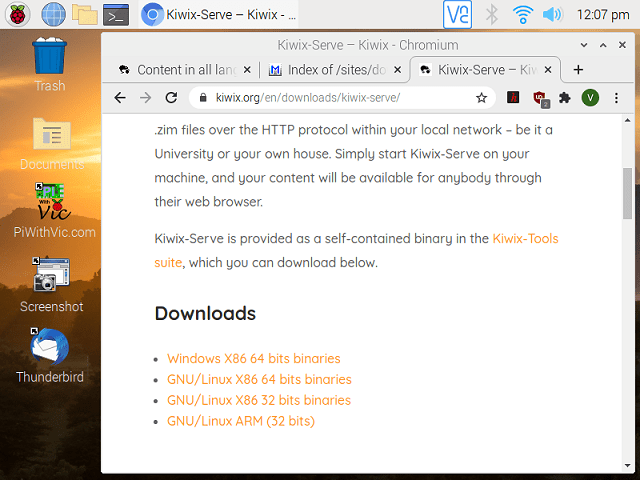
The GNU/Linux ARM (32 bits) package for the Kiwix-serve should be in the Downloads directory within your Home directory. Future versions of this application will be named differently. If needed replace file name in tar command above with what was downloaded in web browser above.
Uncompressing tar archive file for Kiwix Serve:
On your Raspberry Pi Desktop, open the Terminal and enter the following commands:
cd Downloads
tar -zxvf kiwix-tools_linux-armhf-3.1.2-4.tar.gz
The picture below shows the results of opening and un-compressing archive with tar:
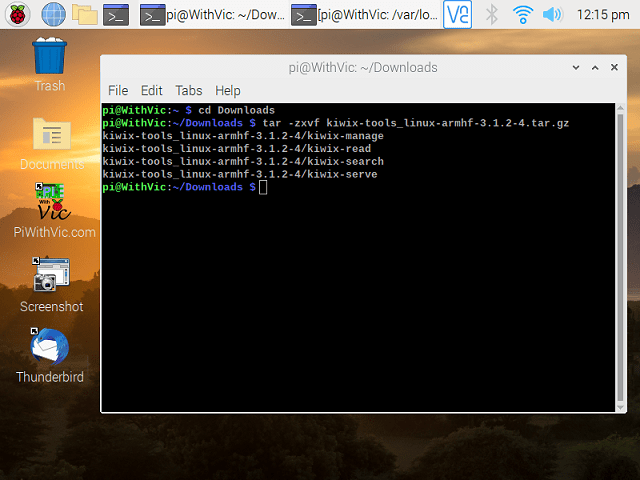
After using tar to open contents of downloaded file for Kiwix-serve, a new directory named kiwix-tools_linux-armhf-3.1.2-4, will have been created. If the file name downloaded is different replace as needed. The ls shell command can be used to list directory contents within downloads to retrieve name of file downloaded.
Installing Kiwix Serve executable files:
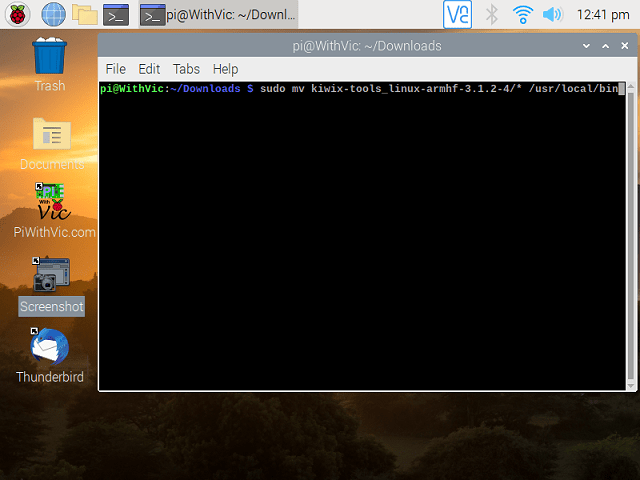
The next step in the installation process is to copy several Kiwix Tools to the “/usr/local/bin” directory. This will install the Kiwix-serve application on your Raspberry Pi computer. As noted, you may have to change name in example to what was downloaded above.
Use the following commands in your Raspberry Pi Terminal:
sudo mv kiwix-tools_linux-armhf-3.1.2-4/* /usr/local/binThe picture shown below is an example of command used above:
Step Three: Install Zim File for Offline Wikipedia:
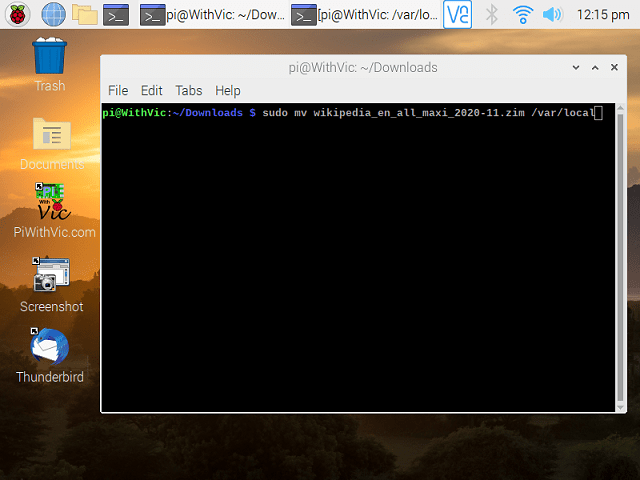
Enter the following command to move the large zim file into Kiwi-serve application’s data location:
Note: You may need to replace file name shown below with the name of zim file you downloaded if different…
sudo mv wikipedia_en_all_maxi_2020-11.zim /var/localExample of above command is shown below:
Step Four: Installing Service for Automatic start after rebooting:
Now that the Kiwix-serve tools, application and zim data file for Wikipedia has been installed the next step is to create a configuration file for installing the Kiwix-serve service. Installing the service will make sure each time you reboot your Raspberry Pi, Kiwix Service will start automatically.
Using nano or your favorite text editor like nano, enter the following command below in the Raspberry Pi Terminal:
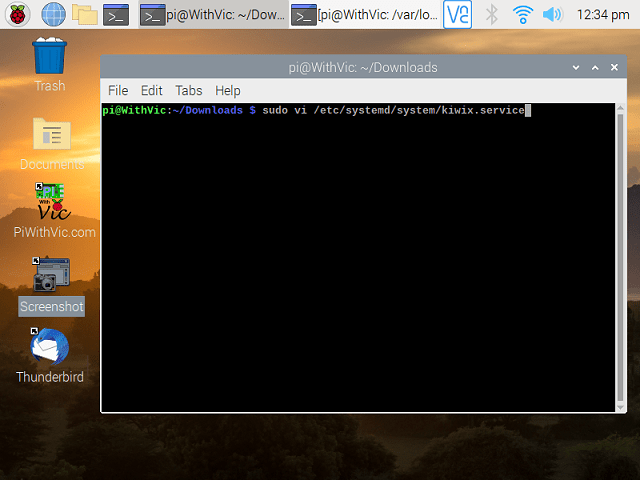
sudo nano /etc/systemd/system/kiwix.servicePicture below shows vi (Can replace with nano) as used above starting the editing process:
Service Configuration:
Copy the following text as shown in box below:
Note: Replace the zim file name on the line below that starts with “ExecStart=” with the name of file downloaded in previous step, displayed in blue, and bold.
[Unit]
Description=Kiwix Service
After=network.target
[Service]
Type=simple
User=root
Group=root
ExecStart=/usr/local/bin/kiwix-serve /var/local/wikipedia_en_all_maxi_2020-11.zim -p 8080
Restart=always
RestartSec=3
[Install]
WantedBy=multi-user.target
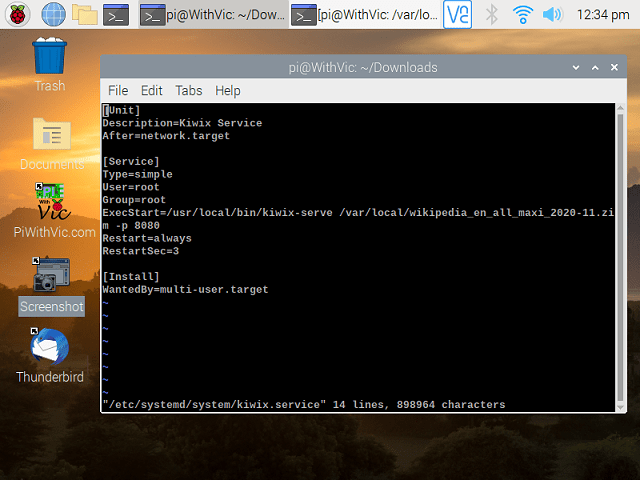
Paste copied text from above into the text file editor, save the file and exit as shown below:
Enabling and Starting Service:
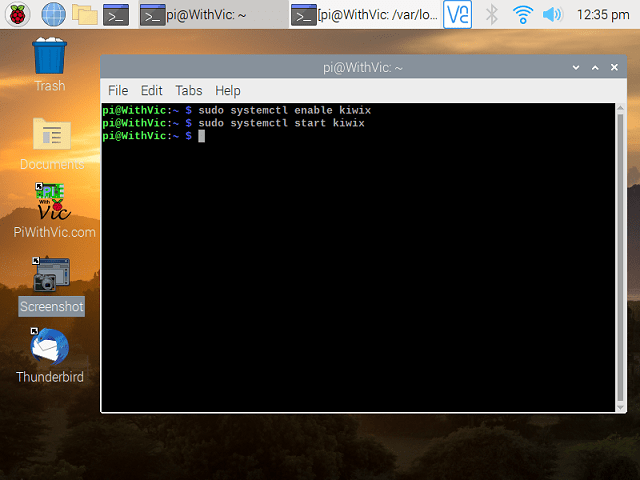
Now that the service file has been created enter the following commands into the Raspberry Pi Terminal to enable and start Kiwix-serve service application:
sudo systemctl enable kiwix
sudo systemctl start kiwix
Picture shown below describes commands used above:
Step Five: Using your web browser to view Offline Wikipedia:
Enter the following URL into your web browser as shown below:
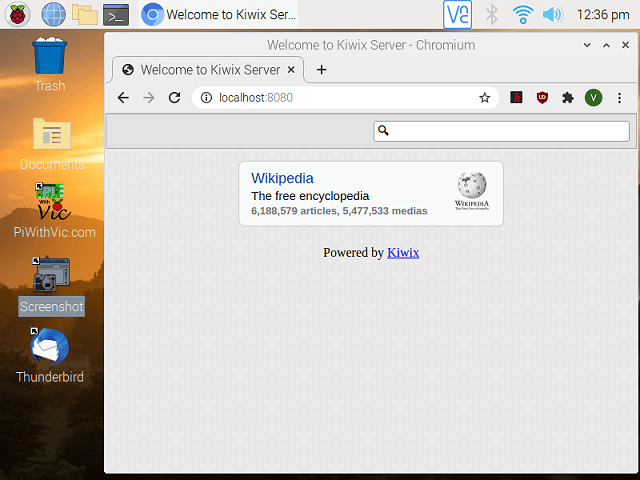
http://localhost:8080/The picture below shows example of using Wiki-serve on your Raspberry Pi Computer:
Summary of Raspberry Pi Projects Offline Wikipedia:
Congratulations! You how have a copy of one of the world’s largest if not largest online encyclopedias on your Raspberry Pi.
Consequently, try entering something in the search box like the following text:
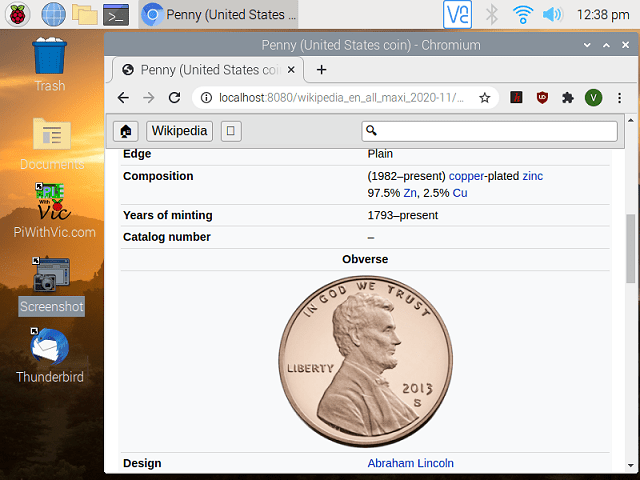
lincoln cent pennyThe following search results will be displayed as shown below:

As a result, select the Lincoln cent link to view article with picture of penny as shown below:
Have fun and as I always like to say…
Never underestimate the power of the Raspberry Pi!
Regards,
Vic
